

Showing posts with label sponging. Show all posts
Showing posts with label sponging. Show all posts
Monday, 5 January 2015
Fadin' Daze
Well a very Happy New Year to all of you lovelies! I posted today's post on Instagram back when I did it like 11 months ago, intending to create the matching blog post immediately afterward, but you guys know how ridiculously slack I am! So it's been the better part of a full year and I'm just getting round to it now. Big slaps on the wrist for me! I still wanted to do this post though, in the hopes that it serves as evidence and/or inspiration for anyone starting out with nail stuff. Yeah it's another before-and-after, but this time it's Gradient Style! Check it!
Sunday, 30 December 2012
Bahamian Blues
Hello, hello lovely people! Yeah okay so I've been a touch AWOL for the last few... weeks... and I am sorry I haven't been sharing / updating, but working in retail over Christmas leaves VERY little time for anything else. For example, I finished all of my Christmas cards on the 21st, because it was my only day off before the big day. SO glad to hear the lovely blogging ladies I sent cards to a bit earlier in Dec received them in time ^_^. Anyway, on with the post!
Today's mani is the first I've done in OVER TWO WEEKS. I know, right? Insanity!! Over the Christmas rush at work I simply didn't have the time or energy to make my nails all pretty, and have been working with nothing but a coat of OPI Nail Envy on my tips. I kept ripping nails at work (if any of you know of or have Pandora bracelets, you'll understand that the clasps are hazardous to even the most basic mani!) so I had to chop 'em all off again. Behold the nubs.*sigh*
.JPG) Before Christmas I ordered a bunch of nail polishes from Head2ToeBeauty.com, and today's featured polish is one of the 9 China Glazes that arrived on my doorstep. Yes, I bought 9 China Glazes. You already knew I had a problem!! This is one coat of Bahamian Escape, with an accent nail gradient using OPI My Boyfriend Scales Walls to mix it up a bit. All nails finished off with Seche Vite fast drying top coat.
Before Christmas I ordered a bunch of nail polishes from Head2ToeBeauty.com, and today's featured polish is one of the 9 China Glazes that arrived on my doorstep. Yes, I bought 9 China Glazes. You already knew I had a problem!! This is one coat of Bahamian Escape, with an accent nail gradient using OPI My Boyfriend Scales Walls to mix it up a bit. All nails finished off with Seche Vite fast drying top coat.
.JPG) The gradient on my left hand sucks, so I photographed my right hand instead =P. A lovely gal on IG asked for tips for doing a sponge gradient, so I thought I'd include some here since it's a wonderfully easy and effective technique once you get the hang of it. For a foolproof method, check out Sammy's tutorial.
The gradient on my left hand sucks, so I photographed my right hand instead =P. A lovely gal on IG asked for tips for doing a sponge gradient, so I thought I'd include some here since it's a wonderfully easy and effective technique once you get the hang of it. For a foolproof method, check out Sammy's tutorial.
1- Always remember that as with any nail art technique, it takes some practice to figure out how it works / what works for you / your own method to get it how you want it. Having said that, I've discovered that some gradient accidents are pretty much universal.
2- Let the polish on your nail dry before trying to add layers, otherwise sponging over it will lift the underneath polish instead of adding more. This is how you get blotches of missing polish (it took me a while to figure that one out... I'm notoriously impatient!)
3- Make sure you have plenty of polish on the sponge, because if the polish on your nail isn't dry enough and less than what's on the sponge, again you'll just lift off what you've already put down.
4- Be prepared for it to take a few layers before the colour is as opaque as you want it to be. Considering how little polish you're using each time you sponge some on (especially when using polishes that can take a couple coats to be opaque during normal application), it's gonna take some time to build up.
5- PRESS LIGHTLY. Pressing too hard, especially if you don't have much polish on the sponge, will cause bits of the sponge to break off and get stuck on the nail. It's a pain in the [bleep] to sit there picking out bits of sponge with tweezers because you were getting impatient with the colour not going on! Patience and practice are key =).
.JPG) If you scroll up and look at the first pic of my left hand, you'll see I managed to make all those mistakes =P there are bits of sponge stuck on the nail, bald spots from pressing too hard with too little polish, and lovely big blue dots from being impatient with my sponging. I'm still learning, too! I do love how my right hand turned out though...
If you scroll up and look at the first pic of my left hand, you'll see I managed to make all those mistakes =P there are bits of sponge stuck on the nail, bald spots from pressing too hard with too little polish, and lovely big blue dots from being impatient with my sponging. I'm still learning, too! I do love how my right hand turned out though...
I said I got 9 new CGs, so here's the lineup! For US$3.25 each, I had a really hard time controlling my impulse buying LOL. Click click click new polish! It's dangerously easy these days =P


Today's mani is the first I've done in OVER TWO WEEKS. I know, right? Insanity!! Over the Christmas rush at work I simply didn't have the time or energy to make my nails all pretty, and have been working with nothing but a coat of OPI Nail Envy on my tips. I kept ripping nails at work (if any of you know of or have Pandora bracelets, you'll understand that the clasps are hazardous to even the most basic mani!) so I had to chop 'em all off again. Behold the nubs.*sigh*
.JPG)
.JPG)
1- Always remember that as with any nail art technique, it takes some practice to figure out how it works / what works for you / your own method to get it how you want it. Having said that, I've discovered that some gradient accidents are pretty much universal.
2- Let the polish on your nail dry before trying to add layers, otherwise sponging over it will lift the underneath polish instead of adding more. This is how you get blotches of missing polish (it took me a while to figure that one out... I'm notoriously impatient!)
3- Make sure you have plenty of polish on the sponge, because if the polish on your nail isn't dry enough and less than what's on the sponge, again you'll just lift off what you've already put down.
4- Be prepared for it to take a few layers before the colour is as opaque as you want it to be. Considering how little polish you're using each time you sponge some on (especially when using polishes that can take a couple coats to be opaque during normal application), it's gonna take some time to build up.
5- PRESS LIGHTLY. Pressing too hard, especially if you don't have much polish on the sponge, will cause bits of the sponge to break off and get stuck on the nail. It's a pain in the [bleep] to sit there picking out bits of sponge with tweezers because you were getting impatient with the colour not going on! Patience and practice are key =).
.JPG)
I said I got 9 new CGs, so here's the lineup! For US$3.25 each, I had a really hard time controlling my impulse buying LOL. Click click click new polish! It's dangerously easy these days =P

Click on the pic to see 'em bigger =). I bought my very first backup polish (Happy Go Lucky) but all the others are brand spankin' new to my collection! So excited to get creative with these babies! I haven't taken their mugshots yet, but for Christmas my amazing brother Andy got me 4 OPI polishes - all from my wishlist! Either he's psychic or he can tell what I'll like LOL. He got Wocka Wocka, Skyfall (my biggest lemming for the last month!), Wooden Shoe Like To Know?, and Dating A Royal. Are you jealous? Yeah, I know you are. Who's got the best brothers in the world? That would be me! =P
Have you bought a backup of a nail polish you use a lot, or are afraid of not being able to get in the future? What's the largest number of polishes you've ever bought at once? I hope you've all had amazing holidays wherever you are in the world, and thank you for checking in! Only 2 days left of 2012!! Woohoo!!! ^_^
PS: Did you know that 2013 will be the first year since 1987 that has four different numbers in the date? Random useless fact for the day! Xx
Monday, 3 December 2012
Grape Gradient
Hiya! Happy December!! Continuing with my 'slack blogger is slack' theme, I have zip zero no energy, so just enjoy the pics... =)
.JPG) The dark purple is two coats of China Glaze Grape Pop, and the accent nail is a gradient using Grape Pop and OPI A Grape Fit. All nails topped off with a coat of Seche Vite (two coats on the accent nails). ^_^
The dark purple is two coats of China Glaze Grape Pop, and the accent nail is a gradient using Grape Pop and OPI A Grape Fit. All nails topped off with a coat of Seche Vite (two coats on the accent nails). ^_^
.JPG)
.JPG) The nail on the middle finger of my left hand (the hand I photograph) currently has a great big tear in it *sniff* - almost down to the quick but not quite. I've glued it back together and so far so good, but because of this I'm trying to limit how often I paint my nails (waaaah!!!) so that removing the polish is at a minimum, and I won't annoy the nail / soften the glue holding it all together. That one nail is insanely weak since the last time it ripped (couple of months ago) because I buffed it to within an inch of its life trying to get it smooth enough after repairs to hide the rip. I'm currently slathering copious amounts of Sally Hansen Continuous Treatment - Strength on it in the hopes that it'll stand up to polishing and typing and working and such, long enough for the tear to grow out. I guess I'll be able to review the Sally Hansen treatment in a wee while! So far so good - I put two coats on before I went to sleep the other night, and in the morning the nail was rock solid! It does tend to peel off if I put too much on, but for the most part it's working like magic at the moment. If nothing else, the rest of my nails should be stronger after this ordeal!
The nail on the middle finger of my left hand (the hand I photograph) currently has a great big tear in it *sniff* - almost down to the quick but not quite. I've glued it back together and so far so good, but because of this I'm trying to limit how often I paint my nails (waaaah!!!) so that removing the polish is at a minimum, and I won't annoy the nail / soften the glue holding it all together. That one nail is insanely weak since the last time it ripped (couple of months ago) because I buffed it to within an inch of its life trying to get it smooth enough after repairs to hide the rip. I'm currently slathering copious amounts of Sally Hansen Continuous Treatment - Strength on it in the hopes that it'll stand up to polishing and typing and working and such, long enough for the tear to grow out. I guess I'll be able to review the Sally Hansen treatment in a wee while! So far so good - I put two coats on before I went to sleep the other night, and in the morning the nail was rock solid! It does tend to peel off if I put too much on, but for the most part it's working like magic at the moment. If nothing else, the rest of my nails should be stronger after this ordeal!
Do you fix rips in your nails or just cut 'em all off? Have you tried the teabag method? Sorry about this lame post, but at least it has some pretty pictures in it! Thanks for stopping by, lovelies! ^_^


.JPG)
.JPG)
.JPG)
Do you fix rips in your nails or just cut 'em all off? Have you tried the teabag method? Sorry about this lame post, but at least it has some pretty pictures in it! Thanks for stopping by, lovelies! ^_^
Edit:

See that little red line? That's the rip >.< I know it looks tiny, but that shape in that position means if I trimmed my nail back to it, it'd be a super nub once again, and I'm just not having it! The red is because I was wearing OPI Big Apple Red when the rip occurred, and trying to remove the polish without damaging the nail more = stained layers of nail. Wah! Wish me luck keeping this baby in one piece...
Wednesday, 7 November 2012
French Grapes (and some Whine)
Well hello again! I know, I know, slack blogger is slack, and I really have no excuse... But look! A gradient mani! The prettiness makes up for my slackness, yeah? *ahem* Anyway... Today's mani is a gradient mani using BYS French White and OPI A Grape Fit - my current obsession.
.JPG) There's not really a tonne to say about this mani... I stamped the accent nails using French White and Bundle Monster plate BM310. The stamping on this mani is craptastic, and that's the nicest word I can think of to describe the train-wreck that occurred. I photographed the best nail (yeah, I know, that's how bad it was...) which I had to double stamp because it translated so badly the first time. I tried to line it up, I swear! But it was not to be. *sigh*
There's not really a tonne to say about this mani... I stamped the accent nails using French White and Bundle Monster plate BM310. The stamping on this mani is craptastic, and that's the nicest word I can think of to describe the train-wreck that occurred. I photographed the best nail (yeah, I know, that's how bad it was...) which I had to double stamp because it translated so badly the first time. I tried to line it up, I swear! But it was not to be. *sigh*
.JPG)
.JPG) Ugh. This mani was just NOT working with me today. I didn't even attempt to photograph my right hand because it was twice the disaster of what you've seen. Don't get me wrong, I think it looks really nice here in photo form, but the stamping was horrible, my right hand turned out extra crappy, and overall it was just a total downer for me. You ever have that "This is gonna look sooo great!!" moment in your head, and the execution is just... meh.? Yeah, that's what this was. Humph.
Ugh. This mani was just NOT working with me today. I didn't even attempt to photograph my right hand because it was twice the disaster of what you've seen. Don't get me wrong, I think it looks really nice here in photo form, but the stamping was horrible, my right hand turned out extra crappy, and overall it was just a total downer for me. You ever have that "This is gonna look sooo great!!" moment in your head, and the execution is just... meh.? Yeah, that's what this was. Humph.
Sorry to be such a total Debbie Downer on you today, but this is just such a 'could do better' mani that it's left me all meeerghhh... Maybe a nice watermarble will cheer me up... ;-)
What was your last mani-related disappointment? Do you try to touch up what you don't like, or take it all off and start over? Thanks for reading, lovelies, and sorry again for such a pfft reading experience... =P

.JPG)
.JPG)
At least the gradient is pretty, right??
.JPG)
Sorry to be such a total Debbie Downer on you today, but this is just such a 'could do better' mani that it's left me all meeerghhh... Maybe a nice watermarble will cheer me up... ;-)
What was your last mani-related disappointment? Do you try to touch up what you don't like, or take it all off and start over? Thanks for reading, lovelies, and sorry again for such a pfft reading experience... =P
Tuesday, 9 October 2012
Double Trouble
Hello hello, beautiful people! I put up a sneaky peak of the first of today's manis on Instagram and promised clearer pics on today's blog post, but when I got around to editing pics to make them post worthy, I realised how terrible my cuticles were in the photos - very dry, really torn up and obviously recently bleeding in a couple of places! So instead of a) editing til the wee hours to make them presentable or b) subjecting you to the horror that was my un-cared-for cuticles, I touched up a couple of pics (badly, hurriedly) and thought I'd give you two manis instead of one to make up for it =D. First up we have OPI Do You Lilac It?!


 As always, I used this magical tutorial from the ever brilliant Sammy of The Nailasaurus to create the gradient. When it was dry (and I did a lot of waiting because the stamping doesn't adhere to the quick dry top coats I have #firstworldproblems) I stamped in BYS French White using Bundle Monster plate BM318.
 I did this mani at the start of Spring, though looking at it now it's more of a Summer mani. It reminds me of cool drinks on hot days, sunshine, blue skies, clean water... Yep, okay, I'm keen for Summer now!
 Again, my cuticles weren't in the best condition, but the mani kinda makes up for it, no? Aquadelic stained the [expletive] out of my nails and cuticles, partly because gradient manis can get kinda messy but also because I didn't have a base coat yet. Oh, that reminds me, I probably used one layer of OPI Don't Touch My Tutu under the gradient because it was pre-base coat =).
Do you have a favourite opaque silver polish for stamping? How do you look after your cuticles? Thank you SO much for reading, gorgeous! Stop in again soon =D


I started with Cult Nails Get It On base coat, then applied two coats of OPI Do You Lilac It?. When that was dry, I added accent nails of China Glaze Prism from the (seriously stunning) Prismatic collection, because I needed a bit of glitter in my life =). On my non-accent nails I stamped with Bundle Monster plate BM319 using China Glaze Icicle. I'm reasonably happy with this silver for stamping, but I'm still keeping an eye out for a more opaque silver!

A close up of the shimmery sparkle! Prism has a light purple jelly-ish base with every colour of glitter you could ever want packed into it. The Prismatic collection is packed full of gorgeous glittery bits, but it starts out reasonably sheer and builds to unimaginable glittery goodness! This is one coat of Prism and you can see plenty of Do You Lilac It? peeking through. Gorgeous or what?
The second mani I have for you is one I posted on Instagram yonks ago (yes, I said 'yonks'), but I'm still totally digging it and have had to convince myself out of recreating it many times since I took it off! Presenting a gradient mani in China Glaze Aquadelic and OPI No Room For The Blues!


Do you have a favourite opaque silver polish for stamping? How do you look after your cuticles? Thank you SO much for reading, gorgeous! Stop in again soon =D
Wednesday, 12 September 2012
Pink Wednesday: Fadin' Gradien'
Weee! It's Wednesday!! As you know On Wednesdays We Wear Pink and today's extra pink mani features a gradient with some stamping thrown in for good measure.

 While I thought this was pretty nifty, it was a bit blah and 'done', so I wanted to add a little sumthin' sumthin' to kick it up to the next level of mani... Enter my Bundle Monster stamping plates!
 I waited and waited and waited 'til my gradient was completely dry (without any help from Seche Vite because I've found my stamps don't work well over top of that glossy glass finish!) and stamped in BYS French White with Bundle Monster plate BM322.
 I like how the stamp looks like it's fading out into the white, or the gradient looks like it's fading in, or something... It's a cool effect =P. Can't wait to try this with other colour combos and stamps! Those 2012 Bundle Monster stamping plates are just incredible. Loves 'em!


I started off with two coats of BYS French White, and when that was dry I sponged on a gradient in French White, China Glaze Something Sweet and OPI Kiss Me On My Tulips. I know, I know, KMOMYT again?? I'm sorry! I swear I'll venture into other polishes soon =P.


Here's a snap of the gradient while I was waiting for it to dry. I really like the texture on these babies. Maybe I'm just bored of ye olde glossy glossy? Meh, I think it's cool ;-).
How do you mix up a mani you've done before? Do you like gradients with a tonne of colours or only a couple? Happy Wednesday, lovelies, thanks for stopping by!! =D
Saturday, 25 August 2012
Radiant Gradient
Happy Saturday, lovely people! Today's mani is 'from the vault' - one I did a couple of weeks ago and photographed, but didn't post at the time. It's a simple 2 colour gradient (using this tutorial as always!) with OPI Kiss Me On My Tulips and China Glaze Papaya Punch. Enjoy!

 If you look closely, on my pinky you can see a massive chunk of missing polish that I ended up filling in with the polish brush afterwards. That nail was just not cooperating with my sponging and I was pulling more and more polish off with every attempt to add to it. This happens if the bottom layer(s) of polish are still too wet when trying to add more over top... I'm really really good at being too impatient, and more often than not my impatience ruins the whole mani! Patience is a virtue...
 It's my right hand! It's been so long since I posted a snap of my camera-shy hand. I was happier with how it turned out on this side so I wanted to show you how it was meant to look on both hands =P.

 There's something a bit sunset-ish about this colour combo. I'd just picked up the bottles and thought the colours would look stunning together, and settled on a gradient to give them equal nail-space. The camera didn't really pick up how insanely BRIGHT these two shades are, but if you know the polishes, you can understand that this was a rather overwhelming combination when completed!
 I didn't wear it for long, but I'm still pretty happy that the colour combination worked as well as it did. These are two deliciously yummy Summery colours - can't wait to use them more when it heats up a bit more! Thanks for stopping by =D


Wednesday, 15 August 2012
Pink Wednesday: Girly Glitter
Hiya lovely people! On Wednesdays We Wear Pink, and today's Pink Wednesday post is all about the girly glitter! I went overboard playing with deep, dark, bright and bold colours during the run of Hairspray (which is closed now *sniff*) so today's mani is a bit of a palette cleanser! Check it out:
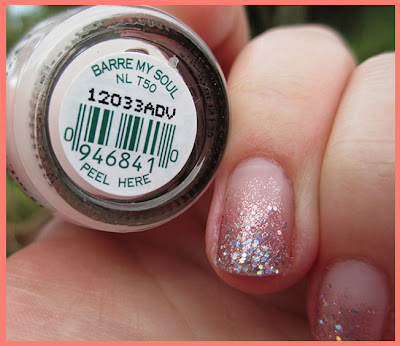
 I started with two coats of OPI Barre My Soul from the New York City Ballet collection - this is my automatic go-to nude pink, it's just sooo creamy and yummy and just does exactly what I want it to do! Don't you just love those reliable polishes you can always count on to do their job? Over top of that I sponged on some OPI Teenage Dream from the Katy Perry collection. I can't believe I haven't used this polish for a Pink Wednesday yet - I keep meaning to, so I finally gave in. I still hate taking off glitter polish, but it's kinda worth it...

 Mega uber massive macro shot to show you the stunning glitter in this baby! If you're not familiar with it already, Teenage Dream is chocka-packed full of pink and sliver shimmer, with hexagonal glitter suspended in a sheer pink jelly base. Yum yum yum! Do you ever come across those nail polishes you could just stare at for hours on end? This is definitely one of those for me!
 My camera had a little bit of a tough time dealing with all that glitter, as you can see, but I'm really loving the effect of the nudie glitter over the nudie creme base. Are you a fan of the nude-based gradient mani, or do you like colours with your glitter? What's the polish that's calling out to be used but you just haven't got around to using for ages? Enjoy your Wednesdays, you lovely people, and smile lots - it's almost the weekend! =D


Friday, 22 June 2012
Fail Friday: First Gradient
Happy Friday! The weekend's just about here, wahoo! I've got a lot of pics for you today, and you'll be able to tell they were taken a while ago! This was my first ever attempt at a gradient, and I think it went terribly wrong. I recorded it step-by-step in the hopes that it'd be awesome, but it was not to be.
 The three colours I chose were OPI Steady As She Rose, Do You Lilac It? and Lincoln Park After Dark.


 Yeeeeah.... This is not the look I was going for. In an attempt to smooth everything out and hopefully help the 'gradual' effect, I smothered my nails in OPI Princesses Rule. Not any better.


 I'm so glad I've improved my gradient technique, because this could seriously put a girl off ever trying again! Ugh just... no...!
Short and sweet today my lovelies! I'm off to look at cameras... Mmmm... Apart from the fact that I seriously love new stuff, my big camera that I use for just about everything is quite a bit behind in the times, and it's not really standing up to what I need it to do anymore. As a point of reference, my stepdad's cellphone produces better images than my big expensive 5yr old camera. *sniffle*. So, to the shops! Thanks for checking in, you wonderful people! =D


Base coat

Base colour: Steady As She Rose. The rest of the photos kinda speak for themselves...


Short and sweet today my lovelies! I'm off to look at cameras... Mmmm... Apart from the fact that I seriously love new stuff, my big camera that I use for just about everything is quite a bit behind in the times, and it's not really standing up to what I need it to do anymore. As a point of reference, my stepdad's cellphone produces better images than my big expensive 5yr old camera. *sniffle*. So, to the shops! Thanks for checking in, you wonderful people! =D
Subscribe to:
Comments (Atom)